
Disclaimer: This page contains advertisements and/or affiliate links. We receive compensation from clicks and/or purchases made through these links. Though we may not have tested the specific product(s) mentioned, we do our best to recommend products that are beneficial to our visitors.
How To Easily Set Up a Salt Water Fish Tank!
Last updated on September 13th, 2026

How to easily set up a saltwater tank!
Welcome to Saltwater Aquariums! If you're reading this, it means you're likely planning to start a saltwater aquarium. Maybe it's your first tank, or maybe you're looking to set up another tank and want to do it easier than last time. Either way, welcome (back) to the addiction!
For this guide, I'm going to focus on the easiest setup from nothing to finished reef tank setup. Each topic covered, have more information and detail available. I will link each topic to an article with more detail in case there is more you're looking to learn. Try not to get too caught up in the details though. Sometimes the best thing you can do is start. Get your hands wet, learn what you like and what you don't, and grow from there!

How To Set Up a Saltwater Aquarium - Aquarium Location
When setting up a saltwater aquarium, much like real estate, the first rule is "Location, Location, Location". The nice part with picking a location for your reef tank is that there isn't nearly as much to consider compared to buying a home. There are a couple of factors to consider though.
First, you want to avoid setting up your reef tank too close to windows. With temperature changes outside, drafts can affect the water temperature more than you would expect. It can lead to coral and/or fish stress. Avoiding this will help prevent problems later.
The next concern to address is to avoid direct sunlight. I know that you know this, but I'll repeat it anyway. The sun is a very strong light. It can cause stress and kill coral that don't need that strong of light. Direct sunlight on a saltwater aquarium can also be exactly what algae needs to grow, and take over your reef tank. Direct sunlight on an aquarium can also increase the water temperature. All reasons not to put your new reef tank in direct sunlight.
Finally, the other thing to consider when setting up a saltwater fish tank is the weight of the tank. If you're setting up a tank under 50 gallons, this isn't really much of a concern. That said, after sand and rock, you can estimate somewhere around 15 pounds per gallon of water, plus the weight of the tank itself. So if you're setting up a small aquarium, it's not much to worry about, but large aquariums are another story.
If you're looking to set up a large aquarium, like a 125 gallon reef, you might want to think about the weight to prevent damage to your home. First off, if you are on a concrete slab, like in a basement, or the main floor with no crawlspace, you're pretty much set to do whatever you'd like. If you're not though, you want the tank to span the most floor joists possible on the lowest floor of your home. The lower the floor, the better general stability.
You also don't want to have all of the weight on one floor joist. That would lead to your floor bowing or failing. You can usually see from your basement or crawl space which way the joists run and where they are. This will help you line the saltwater aquarium up with as many as possible to reduce damage to your home from too much weight.
Summary of where to place the aquarium
Simply put, set up the aquarium away from drafts, windows, vents, and doors. Keep the tank out of direct sunlight as well. If the tank is larger, consider the house's structure and span as many joists as possible if you're not directly on concrete such as a basement.
How To Set Up A Saltwater Fish Tank - Choosing a Tank
Now that you know where you want to set up your saltwater fish tank, you likely have a general idea of what size and/or shape of tank you want. The main things to think about are:
- Aquarium Dimensions - Long vs Tall vs Depth
- Aquarium Shape - Regular Rectangular, Cube, Frag/Breeder, Tall, Hexagon
- All-in-One vs Sump vs Simple Tank with Hang-on-back and In-Tank Equipment
If you haven't decided yet, then a few thoughts to help. The longer the tank, the more swimming space for fish. Remember that fish swim side-to-side, front-to-back, not up-and-down. So the longer the tank, and a bit more shallow (within reason), the better this will be for the fish. It also means more coral, and you won't need as big of lights to reach the bottom.
If you're debating between all-in-one, hang-on-back, or a sump and overflow setup, it depends on your end goal. Hang-on-back is good for temporary setups or lower-cost setups. All-in-one are great if you're limited on space and/or do not plan on keeping high demand coral that may require additional equipment. An overflow and sump setup is the most space consuming, but gives you access to most equipment and if expandable.
Summary of what tank to buy
The best setup for a long-term, expandable reef tank is always "the biggest you can fit". If you have to choose between height and length, always go with the larger footprint, shallower reef. But if they have the same footprint, the taller tank just means there will be less light lower in the tank and you'll need to consider that for coral placement. It also means you may need a ladder or step-stool to reach in the tank.
If you're not ready to fully commit that deep, an all-in-one tank is a great option. The offer a low space, simple setup. You get to DIY a few things and learn without nearly as much expense.
Additional Information about choosing a reef tank
How To Set Up A Saltwater Fish Tank - Temperature Control
Just like how your home needs a thermostat, furnace usually an air conditioner, your reef tank also needs temperature control. Coral is very sensitive to temperature changes, and so are some fish. Generally speaking, the best temperature for your saltwater aquarium will be between 76 and 80 degrees F. The most important part though is maintaining temperature stability.
Picking a temperature within that 76-80 degree range, you will want the temperature to hold within 1 degree. I
tend to target 78 because it's the safest from getting too hot or too cold. To handle this, I like to use
Just getting ahead of the next question you're likely going to ask. The controller built into the heater is usually not very accurate. That is why you want a temperature controller. But if the controller fails, at least the built in controller would help prevent your aquarium heater from being stuck on and overheating the tank.


Do I need a Chiller for a saltwater aquarium?
Deciding if you need a chiller is actually fairly simple. If the room where you are keeping your salt water aquarium can get more than 1 or 2 degrees above the temperature you chose above, then you will likely want a way to cool your reef tank. Since most of the rooms in a home will be below this 80 degrees, you typically don't need one. If you live somewhere that gets warm however, or if you don't have an air conditioner, then a chiller can become critical.
An alternative to a chiller, that I actually use, would be box fans or aquarium fans blowing across the top of the water. While this does increase evaporation, it cools the aquarium fairly well. Keep in mind that you will want a dehumidifier to pull the evaporated water from the air in this case.


Summary of temperature control for your reef tank
Simply put, you need a temperature controller, and a manually adjustable heater (or preset). If your home frequently gets above 78-80 degrees, you will also need to use a fan for evaporative cooling, or consider a chiller for more optimal, stable, temperatures.
Additional Information "What Heater Do I Need for My Aquarium?"
How To Set Up A Saltwater Fish Tank - Choosing a Light
Lighting is arguably one of the most important, and most debated, pieces of equipment for a salt water aquarium. If you're not keeping coral, then lighting can really be anything you want it to be. But if you plan to keep coral, light is very important and everyone will argue about the best brands, colors, timing, coverage, etc.
If you're looking for a simple, low light coral, tank, then most lights built for saltwater aquariums will work. Kessil A80, Kessil A360x, Orphek Bars, and a number of other lights will be more than enough. You can just use a simple outlet timer to turn lights on and off. If you have multiple lights, you can use multiple timers to simulate the lights ramping down. Quick and easy.
If you plan to have an Acropora or SPS tank, lighting is FAR more important. You will want to invest in higher quality lighting such as Ecotech, Kessil A360x, Kessil AP9x, or a large array of Orphek bars, or even one of Orphek's Atlantic or other lights. In short, you will want something stronger, meaning more expensive. For these coral, it may even be worth getting a PAR meter, which you CAN rent via Bulk Reef Supply, to dial in exact lighting strengths.
If you're reading this article though, you're probably not setting up an acro tank. So my favorite, easy to use lights are the Kessil A80 and the Orphek bars.


Additional Information: A Complete Guide Saltwater Aquarium Lighting
How To Set Up A Saltwater Fish Tank - Flow
Just after lighting, the next most important detail for setting up a salt water aquarium is flow. It can be a bit difficult to figure out how much flow you need for a salt water aquarium. It depends on what type of coral you plan to keep, but the type of flow comes into play as well.
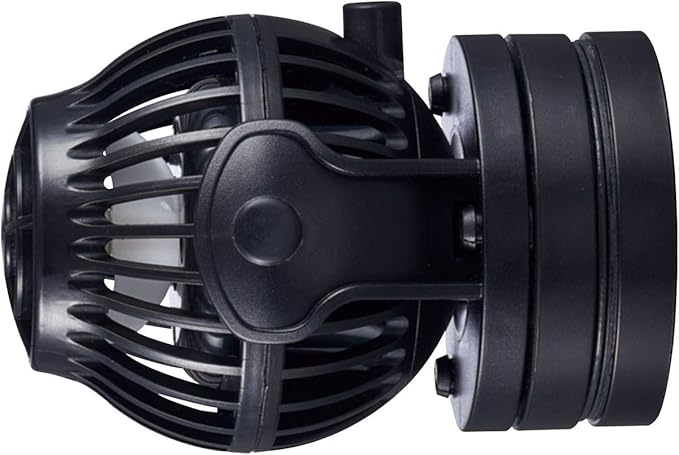
There isn't an exact amount of flow to guarantee success, but there is a rule of thumb to get you started. Most coral need around 40 times tank turnover worth of flow from wavemakers. When planning how to set up a salt water aquarium, I recommend adding powerheads (wavemakers) with flow ratings that add up to the total water volume times 40, but split the flow across multiple pumps. For example, a 75 gallon aquarium would want roughly 3000 gpH of flow (75x40=3000). Then you split this up across 4 pumps. So you will want roughly 4 pumps at 750gph or more. The more pumps, the better because it allows the flow to mix around the tank and cover more area, rather than just one source of flow. Just don't use so much flow that the fish can't swim.
This is really just a starting point, because there are different types of flow, and some coral want more flow while others want less. Acropora Tenuis for example want a LOT of flow, but torch coral need easily half of what an acropora would like.
Constant flow is a good starting point, but if you can get a wavemaker that randomizes the flow, that is significantly better. Randomized flow is better for fish and coral, and helps move detritus better. I personally like Gyres as well. These pumps use a wide sheet of flow, much closer to how a wave works, and covers more space.



Additional Information: A Complete Guide to Flow for Reef Aquariums
How To Set Up A Saltwater Fish Tank - Plumbing
If you bought an all in one tank, you can pretty much ignore this step. If you're going to have a sump though, this is going to be important.
Plumbing a reef tank requires patience, and far more planning than you would think. A few examples are making sure the drains for your tank are above the top of the sump. As well as making sure your pipe is always angled down, and never back up! This is especially important if you have a sump on the same floor but far away from your tank!
If you are about to start plumbing your reef tank, you should read
How To Set Up A Saltwater Fish Tank - Filtration
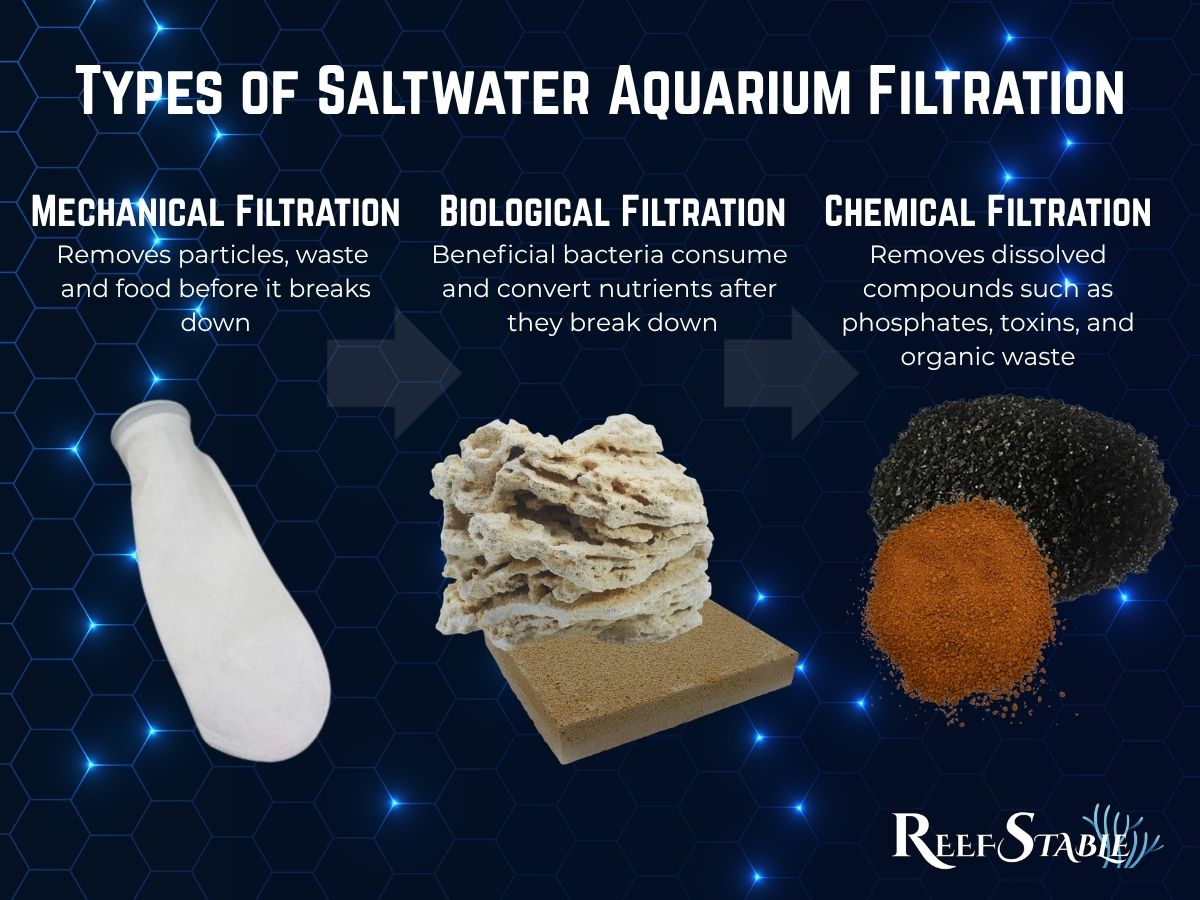
There are 3 types of filtration when setting up a salt water aquarium, Mechanical, Biological, and Chemical. Each typE of filtration utilizes different methods of handling nutrients. At a high level, Mechanical filtration can be thought of as removing waste before it breaks down. Biological filtration is the bacteria that helps remove nitrites and nitrates after the waste breaks down, and chemical filtration is used for water clarity and one-time fixes.
Mechanical Filtration
Mechanical filtration is the use of saltwater aquarium filter media to remove particles from the water before they can break down further or leech. Some common examples are filter socks, filter floss, protein skimmers, or any other aquarium filters and aquarium filtration that remove particles from the water before it can break down.
For detailed information about Mechanical Filtration, you should read
Biological Filtration
Biological filtration is when bacteria, known as "beneficial bacteria" in the tank converts broken down waste from ammonia, nitrite, nitrate, etc and converts them to less toxic versions. For example, the conversion of ammonia to nitrite, and nitrite to nitrate. Bacteria converts each of these to the next, less toxic version. Some of this bacteria then eats the nitrates and is either eaten by coral or removed by the protein skimmer.
For detailed information about Biological Filtration, you should read
Chemical Filtration
Unlike other aquarium filters, chemical filtration is typically very specific to the problem being solved. Typically this is high nitrate or phosphate, but it could also be some kind of dissolved compounds such as heavy metals or toxins. While I really can't stress enough that you should find the reason for the high reading, chemical filtration will help bring everything back in check while you work to fix the problem itself.
For detailed information about Chemical Filtration, you should read
How To Set Up A Saltwater Fish Tank - Aquascaping
When aquascaping a saltwater aquarium, there are a number of things to consider, remember, this is the fish and corals' habitat. The most important factor is to make sure you have the right amount of space and environment for coral to grow, fish to swim, while you avoid blocking water flow. It is best to build the aquascape before water is added to the aquarium. This lets you move rocks and equipment around a bit easier, as well as allowing glue to dry better.
You will want to glue the rockwork together because eventually, either you or a fish will bump into a rock and knock the whole thing over. This is much easier to do without water in the aquarium. You will want to put the rock on the bottom of the glass, before adding sand. If you place the rock on top of the sand, if a fish or invertebrate burrows in the sand, the entire structure may fall apart.
As for the best types of rock and how to arrange them when setting up a saltwater aquarium, there is a lot of debate and opinion. Some of this debate comes down to the types of fish and coral. The the first of two styles I recommend are either an open concept that allows more swimming space, coral growth, and less flow prevention. This is a Negative Space Aquascape (NSA).
The other is the old-school wall of rocks. This old school approach provides a lot of crevices for hiding, and a lot of places for coral to grow. This method does reduce swimming space though, and prevent's water flow from reaching certain spaces between and behind the rocks.
Additional Information: Saltwater Aquascaping: Making a beautiful and functional aquascape
How To Set Up A Saltwater Fish Tank - Setting Up the Equipment
Next up is setting up the equipment itself. You will want to put all of the equipment, including pumps, powerheads, lights, filters, heaters, and anything else in their new homes before you fill the aquarium with water. DO NOT PLUG ANYTHING IN YET!
Make sure there is enough room for all of the filters, powerheads, pumps, plumbing, ect, and that everything can be easily accessed for cleaning and maintenance.
How To Set Up A Saltwater Fish Tank - Mixing Salt Water and Filling the Tank
Now that the rock is in place, the equipment is all in place, and all the plumbing is glued together, you are ready to start mixing salt water, and filling the tank. When mixing saltwater, you will want to use RODI water. This water contains nearly no contaminates. In fact, it is so pure that you CANNOT drink it! You may be tempted to use tap water with a dechlorinator or other "preparation" chemical. While that may work for freshwater aquariums, it's not quite clean enough for reef tanks. Though chlorine is one of the chemicals you want to remove from the water, there is MUCH more you will need to remove, such as heavy metals, minerals, fluoride, and phosphates.
Making RO/DI Water
Tap and well water can contain a lot of minerals that are not good for saltwater aquariums. The water can contain metals such as lead, copper, iron, and chemicals like chlorine and fluoride. Though much of this is okay in certain levels for humans, it can be harsh on a reef tank. It can lead to coral death, fish stress and illness, and excessive algae growth. The worst part is that you won't even know what's wrong until you've spent a large amount of money and likely send in an ICP test.
The answer is to simply use Reverse Osmosis water. There are two ways to get this pure water. The first is to buy RODI water from your local fish store. They will likely sell RO water for somewhere between $0.50 and $1.00 per gallon. This can add up over time, but if you have a small reef tank, or if it is just for a little while, this isn't too bad.
The better answer is to set up an RO/DI filter like this 4-Stage RO/DI System either in your basement, or in another location near a water source and a drain. If you have well water or know your have low quality water, you will want the 6-Stage RO/DI System to ensure that your water is pure. You will want to monitor that you get 0 TDS with an In-Line TDS Monitor, and change the RO filters when the TDS gets above 0.
Additional Information: RO Water for Aquariums


Mixing Salt Water
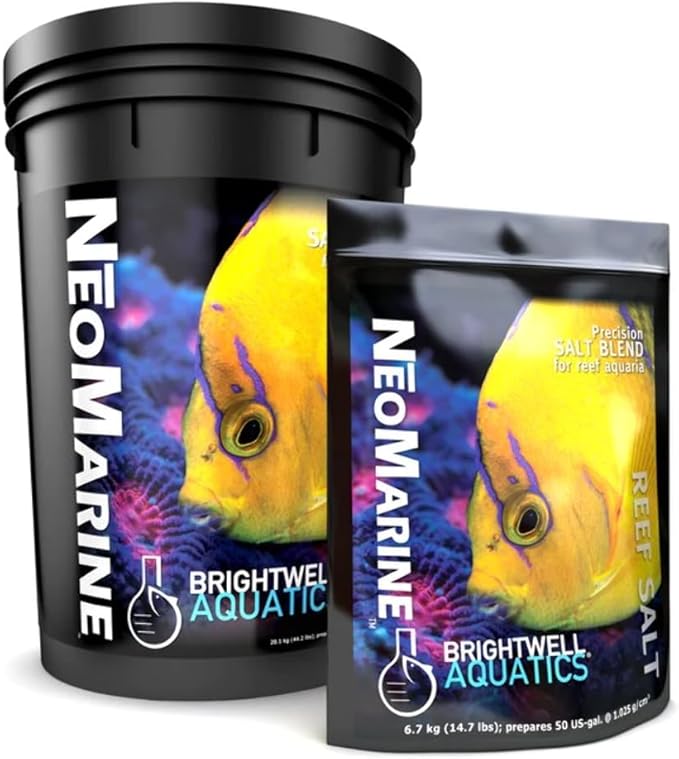
The next step is to mix some saltwater. To do this, you will simply put a small pump in a bucket of RO water, add the aquarium salt mix per the directions on the box or bucket, and then make sure that it is correct with a Refractometer, NOT a hydrometer. Hydrometers are very inaccurate and not THAT much cheaper.
If the salinity is not what you'd like, you can add more salt mix to raise it, or remove saltwater and add RO water to bring the salinity down.
In terms of picking a salt mix, it will mostly depend on your goals. When first filling your tank, you may want to choose a cheaper salt mix. But there are benefits to starting off on a strong note! For help picking a salt mix, check out the article "Reef Salt Mix - Aquarium Salt Mix Parameters"."


Filling the Tank
The moment we've all been waiting for! Filling the tank with salt water! Now that you've mixed the water, it's time to get the tank wet. If you added sand to the aquarium, try to carefully add the water by pouring water over the rock with a bucket or pumping with a hose. Essentially your goal is to minimize how cloudy your water gets. It will clear up as the sand settles, but the less that gets in the water column, the faster that will happen. Ideally, you will add sand after you added water, but I know we all forget sometimes.
Continue to add water until the water flows down the overflow and fills the sump to the desired MAXIMUM level. When the pumps are running and the pipes are filled with water, there will be a lower water level in the sump. However, you want this extra space so that if there is a power outage, the sump doesn't overflow and flood your home.
Once the tank is full, plug in any pumps to get water flowing and check all pipes for leaks. This doesn't need to be the final electrical layout, just doing a check for any problems at this point. This is the best time to do repairs before there is anything living in the tank. Let this run for about a day before plugging anything else in. Just in case something goes wrong. Once you're convinced that there are no leaks and everything is sound, you can start plugging in other equipment. You can also add any live sand if you have decided to use it. Just make sure to pull water out of the tank afterward to bring the water back to the level marked earlier.
How To Set Up A Saltwater Fish Tank - Planning The Electrical Setup
When planning your reef tank's electrical setup, you will want to ensure outlets are both safe and accessible. This means the power strips are not directly above the aquarium where they could fall into the water, nor behind the aquarium where you can't get to them. You do not want them under the aquarium either because a leak could cause an electrical fire! As you can see, we quickly run out of locations...
Ideally you will have the outlets/power strips at mid to top of the tank level, and to the sides of the tank. This way you won't have to worry about it falling in the tank, evaporation, or leaks causing problems. I know this makes it difficult to hide the outlets, and look good. But it could save your life, and/or your home. If you're worried about the look, you should consider a shelf or cabinet that you could use to help keep the outlets hidden while still accessible.
I think my favorite idea for hiding the electrical is to simply use a shelf, and put fake books in front. Make sure the power strips are attached to the wall or shelf, but then these books just sit right in front.


I want to make sure to note some other very important safety concerns for planning electrical. First, you should use Ground Fault Interrupt (GFCI) outlets or breakers. If something shorts, water hits an outlet, etc. The GFCI will KEEP YOU ALIVE! This is VERY important! And they're cheap enough that you shouldn't hesitate!
You will also want to add a drip loop with all cords to prevent a potential fire. This means that the electrical cables that go in water (almost all of them) goes below the lowest outlet and back up. Essentially making a 'U' where one side is in the tank (such as a powerhead) and the other side plugged in. The drip loop prevents water that gets on the cord from traveling to the outlet. Instead it will go to the bottom of the drip loop and drip on the floor.

How To Set Up A Saltwater Fish Tank - Cycling the Tank
The final step you need to know how to set up a salt water aquarium is to kick off the nitrogen cycle. There are a number of ways to start this process, and if you have live sand, the cycle has likely started already. Just remember that the cycle can take a few months, and sometimes and it is best to be patient. Don't add fish or any other living creatures until the cycle has finished. Don't try to use any miracle solutions to speed up the process. Just wait it out, track the parameters, and let the excitement set in.
To help prevent bad algae from growing during the cycle, you should keep the aquarium lights off. You can turn on the filtration to get an idea of how things will flow, but it will not speed up the process. Just stay the course and wait it out.
Adding beneficial bacteria such as MicroBacter7 or


For more information about Cycling your reef tank, and the different ways to cycle a saltwater aquarium, read the article "How to Cycle a Saltwater Fish Tank
Conclusion - ENJOY
I know learning how to set up a salt water aquarium can be intimidating at first, and there is a lot of extra reading. But after you've done it once, it becomes very simple. The most important parts are to plan well, and wait for the cycling to finish. This gives you time to plan out some fish, maybe set up a quarantine tank, or even start looking at more equipment. While you wait for the cycle to complete, here are some articles you can read about the next steps in reef keeping!
- How to Quarantine Saltwater Fish
- How to Acclimate a Fish - Drip Acclimation
- 3 Types of Utilitarian Fish EVERY Reef Tank Should Have
- Picking a Saltwater Cleanup Crew and Utilitarian Fish for your Reef Aquarium
- How to Clean a Fish Tank - Beginners Guide to Saltwater Fish Tanks
- 5 Types of Coral Beginners Should Avoid
- 6 Best Beginner Corals
About the Author
John Krenzer

John is a Software Engineer with a passion for saltwater aquariums, as well as the founder and president of Reef Stable. He started in the aquarium hobby as a child with a 20 gallon freshwater aquarium. His interest in aquarium life grew and in 2008, John set up his first saltwater aquarium.
Today, John maintains an over 300 gallon reef tank system, consisting of a 120g reef and a 210g reef. These large tanks are contained within the same system, sharing a sump as a means to reduce total maintenance and increase total water volume.
John writes articles for the blog as a means to learn about more reef aquarium topics. These articles act as a reference for the readers as well as himself. John updates these articles frequently to provide additional information or make corrections as new information becomes available.
If you would like to request an article, tank tour article, or to collaborate, let me know via the


Social Media