
Disclaimer: This page contains advertisements and/or affiliate links. We receive compensation from clicks and/or purchases made through these links. Though we may not have tested the specific product(s) mentioned, we do our best to recommend products that are beneficial to our visitors.
How to Plumb a Reef Tank
Last updated on November 17th, 2023

How to Plumb a Reef Tank
If you've decided to set up an aquarium with a sump or in-line equipment, you will need to do some plumbing. Thankfully, learning how to plumb a reef tank is simple. The most important part is the design!

Sump - Open Loop
Keeping a sump gives you another tank where you can keep equipment and other filtration. Another benefit is that it gives you more water volume. But all good things come with risks as well.
With sumps, you do risk something falling in the sump. More importantly, if you under-size the sump, you risk overflows when the power goes out or the return pump is turned off. While most of this can be prevented with an over-sized tank and keeping tops on as much of the sump as possible, they are worth noting.
Plumbing with a Sump Design
When planning your plumbing with a sump, the concept is simple in general, but there is always something you may not think about.
The first consideration is keeping a gate or ball valve on the drain. The drain from the tank's overflow should have a way to slow down flow. Otherwise your overflow will rise to a certain point and instantly drain the overflow box to the end of the intake pipe.
The 2 problems from this are noise and ATO problems. It will make a loud gurgling noise as it drains the entire contents of the overflow. More importantly, this causes inconsistent levels in the sump. So your ATO will turn on when not needed and lead to salinity swings.


In-Line - Closed Loop
An in-line, or closed loop system uses a pump to pull water from the aquarium and pushes the water through filters, reactors, and other in-line equipment. All of this equipment is specifically designed to be run out of water, and there is no sump, nor refugium. After being pushed through all of this equipment, the water is pushed back into the aquarium. Making a closed loop, with no sump.
The advantages of closed loop systems include less maintenance of a sump and a cleaner setup. Additionally, without a tank that can overflow, you are far less likely to overflow your aquarium.
The disadvantages, however, include not being able to house a refugium without special external equipment, and needing special equipment for the aquarium. For example, there are few in-line options for heaters. Meaning you will likely be required to put the heater in the tank itself. This may apply to other equipment and filtration such as bio-bricks making your aquarium less attractive to look at.
Who Should Use In-Line vs a Sump?
Personally, I believe that most home aquariums should use a sump. In-line options are ideal for coral farms, fish breeding and housing facilities such as a pet shop. Think of it as residential vs commercial. That being said, as long as it is well designed, I believe a sump design provides far more flexibility and simply better options for your reef tank.
General Plumbing Considerations
What Thickness of Plumbing Should I Use?
A common question, should I use schedule 40 or schedule 80 PVC when plumbing my aquarium? As common as it is, this is actually rather simple. The difference between the two is simply how thick the plastic is. Schedule 80 PVC is designed for high pressure systems, which typically does not apply for reef tanks. The other benefit to schedule 80 pvc plumbing for your aquarium is if your tank is near an outer wall that is a very different temperature than your reef. An example is a basement wall, especially during winter.


So what PVC plumbing do I use? The answer is save a few bucks and go with schedule 40. If temperature or pressure are a concern, you can use schedule 80, however these are typically far fewer than standard plumbing.
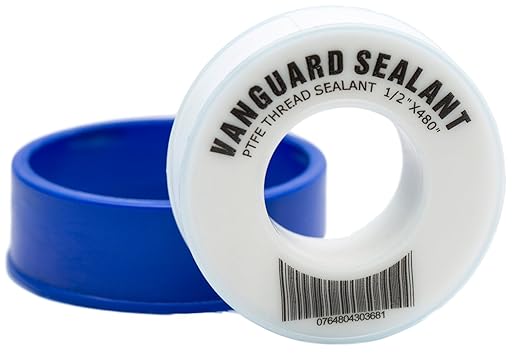
Threaded or Slip PVC Fittings?
One more common question when picking PVC is threaded vs slip. Slip is simply using PVC Primer and Glue, where threaded uses plumbers tape on the threads to hold many parts together. Even though it sounds easier, you will still need glue to put slip to thread adapters on the PVC pipes. Another concern with threaded PVC is that there is a higher risk of water leaking. So while it's up to you, slip PVC fittings are the choice for most reef keepers.


Use Unions EVERYWHERE
I know PVC unions can be expensive, but believe me when I say you will not regret them later. Whenever you need to clean plumbing, change parts like a broken shutoff, or even move the tank or sump, unions are your best friend. These unions will let you un-screw entire sections of plumbing, meaning you can remove and replace them with little difficulty!
As for where you should place unions, the simple answer is anywhere that isn't a straight pipe. Placing unions on both sides of any corners, changes in plumbing size, valves, etc gives you the ability to remove those sections easily if you ever need to move the tank or change equipment such as the sump.


Avoid 90 degree Elbows
When you need to make a 90 degree turn, the easy answer is to use a simple 90 degree elbow. The problem is that the water is flowing and then crashes against the 90 degree wall. Causing turbulence and a backup before the water pressure pushes through.
The simple answer to keep flow moving is to use 2 45 degree elbows instead. This changes the angle over a larger area and with the 2 direction changes, improves water flow and decreases turbulence. This is a simple and cheap alternative and is often just not thought about.
How to Plumb Your Reef Tank
The first step is to install a bulkhead. Depending on the size of the hole in the glass, you will need to use the appropriate sized bulkhead. The 1” Bulkhead is the most common. Simply slide the bulkhead into the hole in the tank so that the nice, flat side and rubber gasket are inside the tank. Then tighten the plastic nut slightly tighter than hand tightened. You will want a bulkhead wrench, however, a regular adjustable wrench will work if needed.
After the bulkhead is installed, you will want to dry fit all of the plumbing. This means that you will put together all of the plumbing, including unions, but without the glue! Make sure everything fits and looks the way you want. Next, you will pull out all of the dry-fit plumbing and begin gluing the plumbing together. You will start by rubbing PVC primer around the outside of the PVC pipe and the inside of any fittings. Then you will rub PVC glue on the outside of the PVC pipe and inside of the fittings the same way. I personally use the cotton “brush” in the can and go around the outside of the pipe and inside of the fitting each 3 or 4 times.
Once you add glue, fit the two pieces together and turn the PVC pipe at least half way to confirm the glue seals the pipe. This will provide a tight, permanent seal.
I've heard mixed reviews on gluing directly to the bulkhead since it basically means you cant remove the bulkhead. You may consider a thread connection at the bulkhead, or a union connection directly at the bulkhead. Try to ensure you're able to remove the bulkhead in case it breaks.
I suggest starting with the drain plumbing first since the return line is generally a flexible hose. If it is not, you can use a PVC to Barb adaptor allowing your return pump to use flexible tubing. Alternatively, you can use PVC for the return and simply follow the same instructions as the drain.


Conclusion
That's it! That's all there is to how to plumb a reef tank. Make sure to over-use unions, use 45 degree elbows instead of 90s whenever possible, and try not to over-think it. Make sure to plan ahead and dry fit everything before gluing and you should be good to go!
Recommended Reading:
- How to Set Up a Saltwater Aquarium
- How to Design a Reef Tank Sump
- A Complete Guide To Choosing The Best Saltwater Aquarium For You
About the Author
John Krenzer

John is a Software Engineer with a passion for saltwater aquariums, as well as the founder and president of Reef Stable. He started in the aquarium hobby as a child with a 20 gallon freshwater aquarium. His interest in aquarium life grew and in 2008, John set up his first saltwater aquarium.
Today, John maintains an over 300 gallon reef tank system, consisting of a 120g reef and a 210g reef. These large tanks are contained within the same system, sharing a sump as a means to reduce total maintenance and increase total water volume.
John writes articles for the blog as a means to learn about more reef aquarium topics. These articles act as a reference for the readers as well as himself. John updates these articles frequently to provide additional information or make corrections as new information becomes available.
If you would like to request an article, tank tour article, or to collaborate, let me know via the Contact Me Page!
Social Media